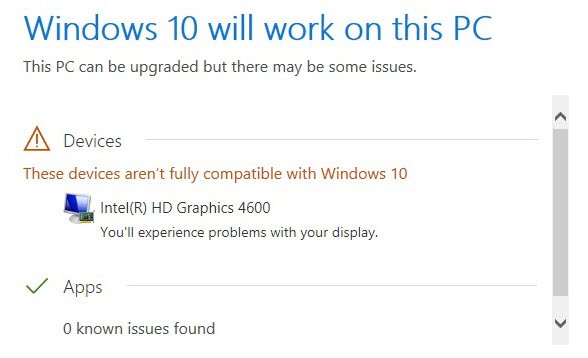
Incompatible Video card error during Windows Installation
1] Find Compatible Driver
The best idea is to visit the OEM website and look for a graphics driver update that is compatible with the version of Windows 11/10 you are trying to install. If you find it, download, and run the installer to update it. Run the Windows Installation again, and see if your problem is solved.
2] Remove Video Card adapter from Device Manager
Press Win + X + M to open Device Manager.Expand the Display Adapters list, and find the graphics device of your PC. Usually, it’s just one.Right-click on the display adapter, and click uninstall.
Windows will install a generic driver which works with Windows 11/10 version. So post this, start the Windows 10 setup again. It will automatically install the driver update which has been tested. The driver will be downloaded through the Windows Update.
3] Install a new graphics card
It’s a good idea to remove your graphics card if it’s getting old. As Windows 11/10 comes with new functions, and the card approaches its end of life, OEM will offer limited support to add new features. At best, it will be useful for the general purpose, but not for high-end gaming and so on. Installing a new compatible graphics card is the best option. However, do not physically unplug the old card without properly uninstalling it from the system. So make sure to follow the same steps we shared in the second recommendation, and then install the new graphics card followed by driver installation.
After this, you should also uninstall the Driver software from the Control Panel. This software offers extra features an option to fine-tune further. If you are installing Graphics card from the same company, it makes sense that you get rid of it completely, and install it fresh.
In the search box, type Control Panel, and when the program shows up, click to open it.Type Programs & Features > Add or Remove Programs.Find the Driver program, select and Uninstall it.If the software offers you to repair it, skip it, and only choose to uninstall.
Now when you run the step, it should work without a problem. Let us know if this guide helped you solve the issue.
